Note from DragonArcherZ: While the wiki focuses mainly on fact, we also want to provide some information for players, and this is a generally decent overview of the strategies and terms you should know. As you improve, you will develop your own opinions, but this page should be a good overall resource to improving, especially for newer players looking for some information on the game. This does not mean everything here is the best play, but it provides a guide for you. Enjoy!
In this article, there will be a variety of strategies. People are free to post their strategies here, although FailingAtFailing (Austin.Micheal.Seto) highly recommends posting your strategy at the Stickpage forums before posting them here, as we want strategies here to be deemed viable by the community, and thus actually helpful. Also, please check to see if a strategy similar to yours has been posted here. Duplicate strategies, or highly similar ones will not help. If you posted your strategy on the forums, please provide a link to your forum topic for reference. Don't make your strategy too specific: it should be flexible and adaptable.
For more general training and tips from high ranking players, head over to the Stick Empires Training Server, a Discord server headed by admin s07 (named Jerry Mouse on the server), here.
General Terms
Before you delve into the metagame, you should know some terms. Many abbreviations that may be used in later paragraphs are defined here
You should also have a general idea of what units are capable of and how they work together, covered on each unit page of this wiki and in brief here
| Term | Definition |
|---|---|
| CvC | An acronym for "Chaos versus Chaos". This term refers to games where both players are using Chaos. |
| CvE | An acronym for "Chaos versus Elemental". This term refers to games where one player uses Chaos while the opponent uses Elementals. |
| EvE | An acronym for "Elemental versus Elemental". This term refers to games where both players use Elementals. |
| Early-Game | The very start of the game. Generally, failure here makes obtaining victory very difficult. |
| Elo | The rating system used in Stick Empires. Originally developed for chess by Arpad Elo. In the Elo system, when one player beats another, the loser gives points to the winner. The amount of points given is dependant on the players' ratings before the game. Elo is meant to be a representation of skill and can be used to predict a player's probability of winning the game against their opponent. |
| Garrison | A command executable by pressing G while units are selected, those units will run back and attempt to enter your castle. While inside the castle, they will gradually be fully healed, be cured of poison and be invulnerable to damage. Useful early-game. |
| Hold | A command executable by pressed H when units are selected. Any units which are "holding" will not move until they are given further instruction. This prevents melee units from being lured out of the rest of the group. Units will still be able to attack enemies within range if they are "holding". |
| Late-Game | Generally consists of one player's final, large assault on the other player - or if possible, both players' final, large assaults on each other. |
| Macro | The monitoring of your army as a whole, mainly in regards as to spending of resources and the timing of doing so. |
| Metagame | The game within the game. Essentially, all the strategies involved with playing the game against other people. |
| Micro | Fine control of units such as specific movement |
| Mid-Game | The time between Early-Game and Late-Game, where both sides will try to build up their forces for the Late-Game as fast as possible, while attempting the slow down the other player's unit production. |
| Non-Aggresion Pact | An agreement that is sometimes asked for in matches. Consists of no aggresive action for an agreed upon time. This may or may not include taking the tower. Sometimes not adhered to by "less-than-honourable" players. Not seen in more competitive games, such as at ranks above 1600. |
| Opening | The first purchases a player makes with their starting 500 gold. Makes a very large impact on the Early-Game. |
| OvE | An acronym for "Order versus Elementals". This term refers to games where one player is using Order while the opponent is using Elementals. |
| OvO | An acronym for "Order versus Order". This term refers to games where both players are using Order. |
| OvC | An acronym for "Order versus Chaos". This term refers to games where one player is using Order, and their opponent is using Chaos. |
| Pressuring | Continuous attacks on the enemy's economy or soldiers to whittle down said aspect of their army. |
| Rush | A semi-common tactic that involves sending all of a player's units straight to their opponent's statue to attack it, disregarding any units and destroying any fortifications along the way. Usually used with fast, semi-bulky units. |
| Tower | The central pillar in every map. By having your units exclusively near the pillar, you will gain control of it (shown with the red bar) and once you have full control, you gain many benefits, making control of the Tower very appealing and part of many strategies. |
| Turtle | Camp at your own base and wait for the opponent to come to you. This may be bad for you if you cannot defend well, but is beneficial if you know how to turtle well and can help you get a good, defended army. |
General Manoeuvres
These are unit control methods that should be used almost all the time, if not in every match, as these basic strategies are crucial to success. Usually the ideal builds used by top players and also an additional extra builds that are ideal if used correctly.
Kiting
Quite possibly the most prominent piece of micro in games featuring fast ranged units - Archidons, Eclipsors and Fire Elementals are good examples. It involves a ranged unit moving while attacking. This is very powerful if used correctly.
Backwards Kiting
The most common form of kiting. The unit doing the kiting will be running backwards from the enemy. When their reload animation is complete, command them to 'garrison' with the "G" button. They will spin around, fire a projectile and resume moving backwards instantly, while reloading. To fire again, you have to cancel the said unit's garrison by right-clicking behind them (so as to move backwards), then click G again.
Forwards Kiting
Less commonly seen, although still done to chase down weakened units. When a unit's reload animation is complete, the said unit must be told to fire at a specific enemy. They will pause for a few milliseconds before firing. Once they have fired a projectile, said player must have the unit resume chase. Fire Elementals struggle to do this at max range due to the slow missile speed.
Meat Shields
Many units in the game are armourless or have low health, making them vulnerable to damage from defence units like Castle Units. To provide some protection for them (at least from projectiles) you should have armoured, better units placed before them - the meat shields!
Speartons are the best units for shielding, although Giants can be used for the purpose as well and may be preferable late game. Multiple Speartons in Shield Wall are more effective in the metagame (as of January 10, 2014) due to them being cheaper than giants, more mobile and being able to automatically stun multiple oncoming melee attackers with Shield Bash. However, Giants have the advantage in their bulk and being able to protect air units, which Speartons cannot do. Giants also have a unique role in preventing certain abilities (like Poison Spray) from hitting their intended targets.
Basically, put your meat shield unit in front of your frail spell casters or archers. If you are facing targeted ability users such as Shadowrath, Medusa or Marrowkai, you may opt to place your Magikill directly behind your giant (if you have one) so it cannot be clicked. You will still be able to use spells from it with hotkeys, but your opponent will not be able to target it, instead hitting the giant. Having meat shields is extremely beneficial as it saves weaker units and allow those weaker units to do damage as well.
Pressuring
Also called harassment by some. It's a general fighting philosophy, that if someone is being attacked, they won't be able to focus on anything except defending very easily. Thus, one who has the tower could easily use small forces of ranged units to put force on the other's army and castle by killing miners, destroying fortifications etc. Usually done with the Tower Spawn to reduce losses if the person defending has a castle archer. High ranked players send in a tanking unit (spearton) to tank Castle Archer hits in order to enter the opponent's base and kill miners(economy).
Cycling
Usually done with Enslaved Giants, although possible in Early-Game with Archidons. Essentially, in a ranged battle, low-health units will be moved behind units with higher health. This increases the lifespan of the units while maintaining full damage potential. Can greatly sway ranged battles in one's favour, depending on timing of cycling. Also used for all the other units to have a higher unit tank damage to give damage for a longer period of time. This is most effective with Merics to heal up the lower health units more rapidly.
Openings
Very often, the fate of the early-game, and the whole game can be affected by the starting units one purchases. The following are common openings that are feasible in all ranks. These openings are for regular matches, not Deathmatch.
Order
Order has a diverse selection of starts, from its pool of three basic units - miners, swordwrath and archidons.
Triple Miner
This start requires, self-explanatorily, 3 Miners early game. Focusing mainly on economy, it is feasible on long maps as the distance between bases will increase the time taken for an opponent to attack your miners - no combat units being available at the time - but is less so on short maps as an early rush can likely bring this start down. This start, however, renders you unable to take the tower or scout the enemy base, having no melee units. This start also considered by many as the worst possible start for Order as the Miners are completely vulnerable to harassment.
Archer + Sword
Usually used on short maps, provides large amounts of damage potential that is very balanced. Can initiate easy pressuring if the opponent does not attempt a similar strategy. This is usually followed by continuous purchase of swordwrath to back up the combination - usually 2 or 4. Heavily relies on micro from both the swordwrath and archidons.
Archer + Miner
Usually done on long maps. A kiting archer has large damage potential over long map due to kiting and thus can easily hold off many threats. Backwards kiting archers have slightly faster movement than forward kiting ones too. Provides a balance between a decent army and a decent economy, usually followed up with a combination of offensive units and miners.
Swords + Miners
Usually done on medium maps or long maps. Can be either 2 Swordwrath and 1 Miner or 2 Miners and 1 Swordwrath. This start is usually followed up with a combination of swordwrath and miners. Provides a mixed amount of economy and some army to hold off the enemy at the tower. Simpler than the above starts in terms of micro but provides no ranged support.
Castle Archer starts
This start surrenders tower control and usually puts the individual at an economic disadvantage shortly afterwards due to the loss of tower money and losing 300 starting gold from economy as well. Variations exist where Castle Archer is purchased slightly later but these strategies are very weak against players that can capitalise on having tower control.
Quadruple Swordwrath
Basically using all gold on swords. You can get a total of four from the get go. A useful start, but with the archer meta, it requires some micro to make this opening work.
Spearton
The now most rare start used, where the miners would ignore gold and immediately go onto mana. They pray 56 mana and with the 500 gold you could get an early Spearton. This however isn't recommended because he could be outnumbered and overwhelmed by Swordwraths and Archidons unless you're out to kill miners to damage the economy of your opponent. In addition, this opening does leave your economy underdeveloped, meaning that an immediate counterattack could be very dangerous.
Chaos
Chaos has very few viable openers - good players will start with 2 crawlers and 2 miners, followed by a third crawler for support.
Crawlers + Miners
Usually 2 crawlers and 2 miners. This allows for a balance, being good for both your offense (crawlers being fast and powerful in numbers) and economy (with the miners). Considered by many as the best of the few viable stars for Chaos.
Triple Miner
The spending of all gold on 3 miners. One may have a better time with this start as Chaos miners have more health than Order miners an Chomplers and they have the ability to regen. However, the regen is too insignificant to change the public view of this opening being the worst of them all.
All Bombers
This start involes spending all gold on 6 bombers. However this isn't recommended because while the bombers may be fast they are vunurable to ranged units. Not to mention that you have to make the bombers worth the gold you spent them on, like taking out clusters of units. However, using 6 bombers can be used to blow up the enemy's miners if you micro the bombers correctly.
All Crawlers
With your 500 gold you can train 5 crawlers. This start may be used by those who want to be highly offensive or want large numbers of crawlers early game to gain an edge.
Juggerknight
This is a very rare start. It applies to the early Spearton start for Order. And just like the Spearton, the Jugger might have a risk of being outnumbered and overrun. It's best to use this start to kill miners or force a mass garrison for economic stall.
Elementals
Elementals also have a good selection of starts, using its four basic elemental units - fire, air, earth and water.
Fire
The Fire elemental has the ability to kite as well as do apply burn DoT. This can make for a good counter against archer-sword starts, as well as do considerable damage to units in pursuit when it is forced to retreat. Normally used on small maps, this is bad for your economy - not allowing you to purchase any other units - but is good as a means for taking the tower.
Air
Using the Air start, one can dominate the sky in early game as Archidons are not so powerful against Air. The Air starters usually target the enemy's miners to force the enemy to garrison, causing economy disadvantage. If the enemy upgrades a Castle Archer, the user will stay guard at the middle tower, gaining economy advantage.
As with the Fire opening, this start is usually used on small maps. This start weakens your economy considerably and is vulnerable to players rushing past your Air Elemental - the Elemental being slow and less capable of pursuit - to attack your miners.
The inability to change unit target quickly that Air units suffer from can be exploited to defeat an Air rush at the start of the game, simply sending in a weak, cheap sword or earth unit in to take the Air's focus and then sniping it with a ranged unit, and falling back once the Air retargets to attempt the trick again till the Air dies.
This opening will, if played correctly against opponents who cannot cope with the Air unit, beat order players early game.
Triple Earth
This starter can gain advantage on both economy and army as the Earth can be used to stun the enemy's army and are a massive threat when massed, just like the Swordwrath mass. As Earths cost 25 more gold than Swordwrath but can potentially die in a 1v1 duel with enemy Swordwrath, the Elemental player will need to get an economic advantage to make up the 'lost' gold. This is often done by choosing the lower-health Earths to morph into Chomplers, because the user will gain economic advantage and more Earths can be trained. Due to the extremely short training time of the Earth, it allows for fast taking of the tower as well. Sometimes a user may turn these Earths all into miners later and opt for a defensive approach.
Earth + Water
By starting with a Water and an Earth, the Elemental player can potentially freeze one of the enemy's opening offense units, and easily pummel the other one with Earth's stunning attack. After this, the Elemental player can quickly get another Earth and get a good offence. The Earths can be transformed into miners later on or combined with Water for a Treature, which allows for easy pressuring with the Scorplings or area control with its death blossom spell.
This start a good lead into the mid-game and a very good offence and (potentially later) decent economy, as well as good harassment opportunities to stop the other person's economy, but is easily beaten because of its main consequence - the bad economy that follows.
Earth + Fire
A risky start than can lead to an advantage. Involves a Fire start, and from there one miner or both miners will go onto mana and pray 100 mana, then combo the Fire and an Earth to make a Charrog. While this puts one at an economic risk, the Charrog has a higher benefit than a Spearton start or a Juggerknight start. Charrogs have a lot more health, so being outnumbered won't be much of a factor. Also, Charrogs have both abilities available, so they could run into the base and wreak damage on miners with burn and burrow. This also allows the Charrog to damage more than one unit attacking it. However Charrog starting against another Elemental player can cause a risk if the other player decides to Earth Water start, as the water can freeze the Charrog on contact and render it useless. Against Order players on small maps this can be chained into more Charrogs and produce very easy victories.
Common Strategies for Order
Click this sentence for the original forum topic
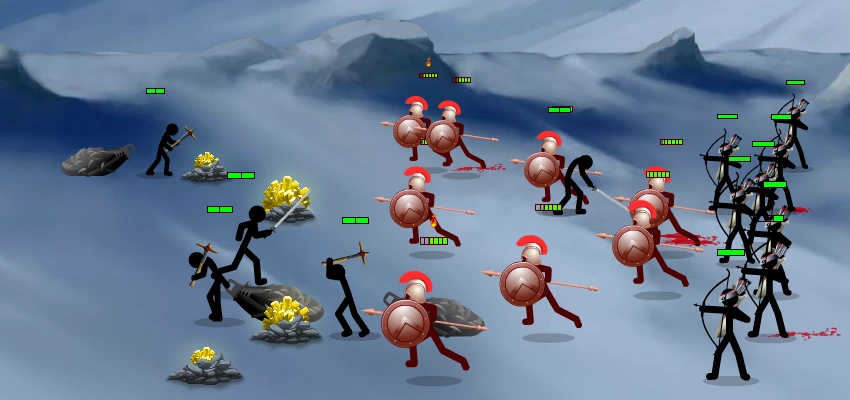
A Spearton rush being performed. The Speartons run past the Swordwrath and Archidons, opting to go straight to the statue.
Spearton Rush
Information
This strategy usually starts by going for a quick Spearton for the opening. This is accomplished by using both Miners to quickly pray for mana.
Someone using this would hold a defensive position and use only a portion of their Speartons (keeping the rest hidden) until they have a sufficiently large Spearton army. Once this point is reached, the person using this strategy will attempt to run past all units and attack the statue, quickly destroying it.
Countering
Someone using this strategy will usually hold a defensive position, allowing you to take the tower. Using tower spawn, you can harass their miners, slowing them down economically and forcing them to deplete more resources on damaged units and defensives, etc.
If your opponent is planning to Spearton rush it is best to get defensive technologies ASAP. At your actual castle, Resilience will double the amount of time it takes Speartons to destroy the statue, while castle archers will deal massive splash damage. Magikill can also be positioned beside the statue and can cast an electric wall on themselves. This will protect both themselves and the statue from Speartons attacking it, as they would receive massive damage if they do so. Poison and Blast will also do a decent amount of damage on Speartons with Burn and Poison DoT. Another way is to simply stop the Speartons from even getting into your base. This can be done by using walls. You can also counter-spear them. A line of 6 Speartons in front of 2 walls can be an excellent way to stall. In addition you can add Castle Archer support and magikill support. The purpose of this is to stall while you inflict massive damage very quickly, and the player would be forced to either try to destroy the walls or retreat his army to avoid them getting killed. All in all, this strategy is effective if the enemy is caught unaware and without defensive measures, but if your adversary is prepared, a Spearton Rush may well be your demise. If against a mass of Speartons as Chaos, then using Miner Towers, Castle Deads, and Giant massing (with a few spellcasters of course) may be your best bet. This is because Giants' AoE stun can do lots of damage to Spearton swarms and ultimately mow them down with a flurry of waving clubs.
Spearcher (Spear + Archer)
This strategy has changed immensely since the auto-shield bash patch. The pre-auto-shield bash version is at the forum topic for legacy purposes. Only the post-auto-shield bash version will be here.
Information
Spearcher is highly used in the current metagame. It is simple and effective and almost any start can be morphed into this strategy.
With a line or two of Speartons protecting a group of Archidon, one using this strategy can create a very effective line of defense. Using Shield Wall and Shield Bash (Automatic, which is what made this strategy so prevalent) the Speartons form a very difficult-to-penetrate defense which is highly mobile. Having essentially 10 bars of health for each Spearton which is Armoured, it is incredibly tough to take down, especially with Meric support healing them. Projectiles will be easily shrugged off and you would need at least more than 6 melee units to actually get through the wall (6 will be stunned with each bash) and those melee units must be able to survive a volley of arrows fired at them.
Countering
Despite the auto-bash, this line of speartons can be countered with enough time. A solution would be to have possibly one or two full grown giants tank arrows for Albowtross with blazing bolts firing down at the Speartons or Archidons behind a wall. Of course, the Speartons will most likely assume an offense and rush one of the giants, wearing it down quickly. It is also possible to constantly harass the Spearton wall to wear it down until it dies, but this would be difficult if they use Meric support unless you have very large numbers of Archidons. As Chaos a huge number of bombs can be staggered and streamed in on the clumped Speartons as a counter. Or you can mass giants to smash through the wall as they are immune to stun and their AoE can easily penetrate the wall of Speartons whether they have shield bash or not. As Elementals utilising repeated AoE can nullify the wall to allow for temporary respite to focus on more critical units.
Late game Magikill and any AoE spell casters can often counter this strategy but this strategy is most prevalent before the late game so getting the spell caster out with sufficient protection is difficult.
The easy counter is to have all your units run through the wall at a single point. No more than two units will be stunned, and you can easily take out a couple merics or archidons. This works best with Speartons/Juggerknights.
In Order vs. Order, another counter would be to have certain units engage the wall while having Shadowrath under shinobi bypass and kill the Archidons (and any Merics/Magikill present) swiftly.
Radiant heat and knockback (such as by giant) can also be used to break the wall.
For Elementals, preparing a scorch to knockback the speartons is a good idea, a scorch is made by a combination of fire and water. After that you may have gained some time to get your units to your tower and kill the Speartons.
Archidon Mass
Information
Usually started with the dual Archidon start, which is done by setting both miners to gold and buying only a single Archidon to begin. Leftover gold would be enough for a second when miners bring in first gold batch. The Dual Archidon start is usually a surprise to the middle ranks, which is the basis behind the strategy: a surprise assault meant to disconcert the enemy.
Eventually, melee units will be brought in if the opponent starts to bring archers. The trade off of one Swordwrath for an Archidonis is worth it.
Someone using this strategy will implement guerilla hit and run tactics to wear down your army. If you chase them, your units will be kited, killing many units that try to get close.
Countering
Any spellcaster with efficient AoE spells - Blast, Poison Spray and Electric Wall from Magikill, as well as Fire Rain and Dragon Call from Infernos, for instance - will be able to quickly kill Archers with any of their spells. In fact, protected spellcasters are the main counter to this strategy. To protect the spellcasters, the use of heavy tanks like Giants are necessary to tank the Archidon. A thick line of Speartons also work because they can chase down Archidon.
Giant Mass
Information
Giants have extreme health and damaging potential, especially if the user of this strategy cycles weakened giants to the back of the army.
Used due to the simplicity associated with simply making giants and moving them forwards.
Countering
This is commonly done with Enslaved Giants because Chaos Giants can easily be kited to death (An exception to this is when Chaos giants are massed in such numbers that they no longer allow you to run past them, though they are still vulnerable to poke). Thus, due to their ability to only hit one unit at a time, A mass of raging Swordwrath , or a Spearton Rush could work, but only against Order giant masses - as Chaos Giant masses have their massive AoE stun, rendering the melee spam strategy moot - and they must go right for the base. Due to the fact that Giants are armoured, mass Albowtrosses protected by giants would destroy giants. Sometimes though, there will be a mage for exactly these units, in which case Shadowrath support may be needed in the form of Shinobi. With Order, Magikill can deal massive damage with Electric Wall on the extremely slow Giants.
To counter masses of Chaos giants, Archidon massing may be a preferable approach to spamming melee units. This is because Chaos giants use melee attacks instead of ranged, allowing Archidons to safely backwards-kite them to death with ease.
However, the easiest way to counter this mass is not allowing it to happen by preventing the miners from mining gold through economy harassment.
Shadowrath Rush
Information
Users of this strategy will attempt to get a Shadowrath as soon as possible to sway the game in their favour. Other than that, works very similar to the Spearton Rush in which the Shadowrath will rush straight to the statue. This strategy is very commonly used by high-rated players, and many players fear this strategy, and for good reason. It is utterly infamous for its extreme speed and the nigh-unstoppability of an en-massed Shinobi II, and as of yet there are almost no hard counters against a properly-microed swarm of Shadowrath.
Countering
A mass of Raging Swordwrath will reduce the effectiveness of Shinobi and Fixate. Castle Archers will be even deadlier to Shadowrath than to Speartons due to the Shadowrath's lack of armour. Miner Walls prevent economy harassment and slow down the ninjas for a bit. Countering is very similar to countering Spearton Rush. A good way to counter a Shadowrath Rush is to use two Miner Walls, Merics with Cure, a mass of Swordwrath with Rage, and a bunch of Albowtross with Blazing Bolts. Magikill behind Miner Wall is very effective because the Shadowrath will not be able to assassinate your Magikill. The Magikill's electric wall can massacre the Shadowrath while they are distracted by Swordwrath. If you happen to face a Shadowrath Rusher as Chaos, get a sizable amount of Crawlers and Bombers (at least 12 of each), as well as a mass of Eclipsors (at least 6) and at least 6 Juggerknights (their Charge stuns, forcing Shadowraths to give up their assassination attempts), to counter them. A Medusa with Venom Flux used in conjunction with that counter is helpful (although the strategy works almost as well without it)
When facing a Shadowrath mass, one often must assume a defensive position and act quickly to amass enough swords and albows and make good use of Miner Walls and Castle Archers before the ninjas come and slaughter his/her army.
Sadly, these strategies aren't 100% hard counters to the Shadowrath Rush, which is why the Shadowrath Rush is so effective and so popular in rated games especially among high-rated players. Spellcasters flee in abject terror at the very mentioning of this strat, and it takes a lot of skill to come up with the right strat and enough units to counter them, especially in Deathmatch where enemies can train Shadowraths very rapidly.
For Elementals, It is hard to counter this but you can use a scorch to deal considerable damage to the shadowrath units. However, smart players would Shinobi their ninjas before that happens, thus evading the attack and rendering it moot.
Shadalbow
Information
One using this strategy will morph into it from a normal start. However, it will soon become evident that they are using many miners for mana (as massing Shadowrath and Albowtrosses is very mana intensive) Usually the first unit that can tip off the use of this strategy is a Shadowrath.
Countering
A very effective counter is Archer Mass, as kiting Archidonis will do heavy damage to chasing Shadowrath and will outrun and outrange Albowtrosses.
Another possible counter is Giants and Albowtrosses. By having all your Albowtrosses target the enemy Albowtrosses first, they will lose their ranged capability (your giants protect your own Albowtrosses from a similar fate) and then their Shadowrath will be defenceless against the Albowtrosses.
Of course, preventing them from building such an army with economy harassment could be easier.
Giants + Albowtross
Information
These two expensive units will require someone executing this strategy to form a defensive position with extreme economy. The extreme damage outputted by the final army is very difficult to match. A Magikill might also add to the very powerful damage of this strategy with poison and electric wall. The Magikill won't be able to be targeted if the person places him very close to the giant so that the Shadowrath or Medusa cannot click on the Magikill.
Countering
A Spearton Rush will be able to run past the Giants and Albowtrosses. They can then destroy the statue with extreme prejudice (provided the opponent has no walls set up).
If the person using this strategy lacks Shadowrath, Magikill protected by Giants may be able to poison many units, killing many of them and many more with blast and electric wall.
Of course, due to the extreme costs of both these units, sufficient economy harassment may prevent the person from executing this strategy in the first place.
For Chaos players you may be able to use your own Giants and Eclipsors if you can get a head start in production but inevitably this will fail if both players keep building up as Albowtross deal far more damage. Medusa mass can be used to engage and stone face spam down enemy Giants with 1 or 2 Chaos giants for cover, followed by retreating to bring stone face off cooldown. As stone face deals 1/3 of a Giants health even at level 2 Giant Growth the opponent will struggle to heal the damage back before you re-engage. Thus, gradually, you can target single giants down without huge losses/damage taken yourself, this strategy is vulnerable to ninjas however and usually prevention of the enemy production is more preferable.
For Elemental Players, it would have been best to have done early economy harassment using the Treatures' Scorplings, but if they have prevailed you can either buy an upgrade such as meteor strike or tornado for the Infernos and Cycloid respectively, or scorch the Albowtross to kill them, a smart player can avoid being harmed by the scorch but if one were to use a Blind Gate to lure the Albowtross that would be a different story. However, an intelligent enemy would simply rush the Blind Gate with a mass of Shadowraths on Shinobi. Since the ninjas would be untargetable, the Blind Gate strategy would be rendered moot as Blind Gate immediately stops working after being passed by 2 or more units.
Common Strategies for Chaos
Early game
Information
Chaos only has one first few mins of the match meta which is Crawlers + Miners followed by Bombers. Any other start is unable to cope with archers early game and cannot hold off swords as well. Crawler x2 + Miner x2 start begins the meta game with more crawlers and miners to follow, then with bombers introduced as well, usually in response to lots of enemy swords or to enemy archers. This meta is still weak in the first minute of the game and is why chaos players tend to struggle on small maps, because losing a crawler in the first minute of gameplay can mean the order player gets into their base and is able to kill off miners. However, this strategy when used with strong micro control to keep all crawlers alive and make maximum use of crawler hp regen can match Order's sword and archer early game and punishes poor order play very well.
Countering
Sword micro to prevent bombers using AoE on multiple swords, archer kiting to 'snipe' bombers before they reach a unit and keeping swords on decent health and garrisoning them to safety when they get low keep chaos from getting the upper hand. In an OvC standard metagame from both sides the player that gains tower will probably be the one that doesn't make a micro mistake first, and players can be fighting over the tower for more than 2 mins into the game due to neither player being able to outright win.
Dead + Jugger core
This is the bread and butter Chaos strategy that you are most likely to have to play against.
Information
Dead + Juggerknight is highly used in the current metagame. It is simple and effective and is easily morphed into from the crawler + bomber early game.
Once Chaos can afford to tech into Deads and research Poison Guts, usually around the 2 minute mark, Chaos can introduce a steady stream of Deads and Juggerknights to deal with the Spearcher they are likely to face. This can then deal with multiple archers unlike Crawlers + Bombers, so if this strategy is started too late the Chaos player may already be too behind. On the other hand, starting into this tech up too early will cripple your economy and mean you will be unable to bring out a steady stream of Deads and Juggerknights. Dead + Jugger is effectively a tankier but slower Spearcher, and most of the time only matches Spearcher rather than countering it. However, a few tactics can gain the advantage for chaos. You can 'snipe' enemy archers by hitting the archers at the edge of a screen with a well positioned Dead, sending the archer back to base to cure the poison; and you can use bombers to force archers away, especially with Juggernight's Charge ability to stay in front of your bombs to prevent them being sniped. You can also use the charge ability to stun enemy units targeting your Deads as a means of protection.
Countering
A Dead army positioned too far into the enemy lines without Juggerknight support can be easily wiped out, as Deads can't run away. Merics also reduce the effectiveness of the poison and sniping completely from enemy Deads and Spearcher + Merics support can usually heal through a lot of the enemy damage. Taking advantage of Order's stronger mobility is key as is keeping archers safe from bombs. Ultimately Spearcher vs Dead + Jugger, which is most OvC metagames, is a skill matchup and there are no hard counters.
Crawler Rush (Contributed by: Java_Script)
Information
A method of continuously queuing and training crawlers in order to overwhelm the enemy or snipe multiple miners. This strategy relies on not getting a single crawler killed early game and soon getting mana for early tech-up for the crawler upgrades and hold the tower. Soon, you go for tower spawn and attack attempting to have the Ghost Jugger tank Castle Archer hits (Assuming they have one) while your crawlers kill as many miners as possible.
Countering
Not lose any swords early game, garrison weak swords. A high degree of micro is required such as kiting and sword splitting just in case they bring out bombers. A mage is very essential in overcoming this build as crawlers have weak health and are much more prone to spells. In Chaos vs chaos, you can counter this by having 2-4 crawlers as tanking units in case the opponent uses ranged units and a continous output of bombers. With Elementals, you can use Treatures' Scorplings to chase the Crawlers and Castle Elemental for guarding the base in case they invade your base. Then get some Water and Fire to kill off those pesky Crawlers.
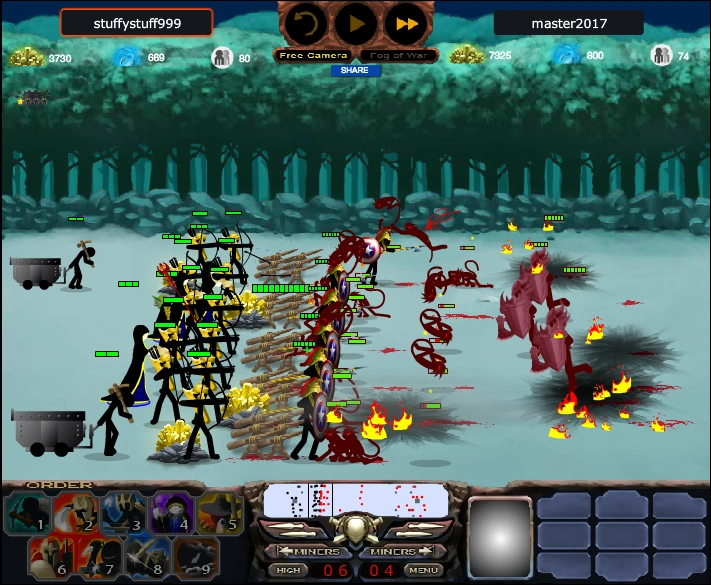
A Crawler Rush being countered. Even though it wasn't all Crawlers this time, using a turtle to counter a rush of just Crawlers will work equally well.
An excellent way to counter a Crawler Rush as Order is to use 2 Miner Walls combined with a turtle composed of Speartons, a swarm of archers, a few Merics, and a Magikill with all its abilities. Archers should also have fire arrows for best results. Another alternative, albeit a more awkward-sounding one, would be 2 Giants with some archers behind a spearton line, with the Miner Walls. However, the former is more damaging because of the higher fire rate from the archers which means more Crawlers killed within a period of time.
Another counter for this is a mass of raging Swordwrath slicing up Crawlers with 2 Miner Walls behind the Swordwrath to prevent the Crawlers from rushing through. You MUST need at least a line of Archidon too, as the rusher will most likely bring in some bombers as well. Merics will negate the damage caused by the burn from bombers (if any) and the damage taken from using Rage.
Juggerknight Rush
Information
This is the same as a Spearton Rush, with the added advantage of the Charge ability which stuns many melee units when it is used. A person would wait until their army is filled to the max with only Juggerknights, then they would rush to the statue, stunning any units in the way.
Countering
To counter this, you could use two miner walls with a line of Speartons in front to tank damage. They would be in shield wall mode, and would constantly bash to delay the attack. Meanwhile, the magikill would cast an electric wall on the Speartons to cause damage. Castle archers and Albowtross might also be needed. Assuming they are noobish enough to do such a strategy, they will probably quit after you defeat their army. If you happen to be Chaos when you are against a Juggerknight Rusher, build Miner Towers and mass giants. You also need a Medusa or two with Poison Pool to mass poison the rush and wear it down. Castle Deads are also very important.
Common Strategies for Elementals
Earth Mass (Contributed by: BladedFire)
Information
A build that consists of a lot of Earth, which are used to stun powerful units and overwhelm a few ranged units. It is normally morphed into from the triple-earth start. This strategy has advantage on both economy and army to evolve to a later state where most combinations are a success. It is perfect for countering Order's Swordwrath mass or Spearton start, as well as Crawler mass from Chaos.
Countering
This strategy is totally countered by Archidon mass and Castle Archer. With Chaos, use Bombers to kill off the army of Earths or use Eclipsors to kill them one by one. When using Elementals, a lot of Airs are required and possibly Cycloids to stun and damage the Earths.
Tree Mass
Information
This strategy, as its name implies, involves the massing of Treatures and the spamming of Scorplings spawnable from the aformentioned Treatures. Normally morphed into from the earth-water start, Elemental players using this strategy try to get mana as soon as possible and morph their two units into a Treature. Besides spamming Scorplings, the Treature can also repel any melee units with its Death Blossom spell. With the poison upgrade purchased for the Scorplings, this strategy can be deadly if allowed to develop.
Countering
With enough swordwrath or crawlers, a few Treatures - even with their relatively large amount of health and armour - can be neutralized quickly enough to not be a threat. Besides, any Scorplings spawned die if the Treature in question dies or unroots itself to move, rendering the Treature an unmovable target and the Scorplings reliant on the survival of the Treature. Thus, on sight of a Treature, no matter whether playing with Order, Chaos or Elemental, one should neutralize it at all costs. Against 4+ Treatures the amount of Scorplings created make melee very unrewarding. Using Ninjas to keep poison DoTs on the Trees with Shinobi costs Elementals a lot of gold in waters to heal and can be used over time in combination with stall tactics, walls and Magikill. Magikill electric wall can take down the Scorplings very quickly but the Order player should be careful not to allow the Elemental Player to take control of it with a V. Transitioning to Castle Archers and a stall inside Order's base and then trying to wait out Elementals to starve of gold may be necessary to win over large numbers of Treatures.
Fire Harass (Contributed by: Skeletonxf)
Information
Only done on short maps due to weaknesses below
A build that consists of a starting Fire, followed by an Earth from the first two Chompler's gold. With the Earth queue time of 4 seconds this can be made in time for the first engage at the start of the match. The fire and earth deal considerably more damage than the opposing archer + swordwrath, so you can force the opponenent off the tower easily and proceed to harrass their miners/base units, which will be needed to make up the economy disadvantage caused by the 450+150 gold start.
Assuming the order player does not allow you to kill off their sword or archer (or both) they will be able to bring out a second sword before you can queue another earth, as your earth came from the gold off your miners. Before this sword comes out you can apply significant pressure but must be wary once it is out, because you lose your monopoly on insta-winning any up front fight.
Pulling back when the opponenent spreads out their units (sword and miners alternating the fire damage) (and stopping you killing any single unit outright) will stop your earth dying before you can bring out a new one. Having an Earth to take hits is necessary to keep your Fire healthy, these low hp Earths can then be made into your miners back at your base allowing you to scale up your eco while heavily commiting to army strength.
Countering
The archer is basically impossible to kill while behind it's statue, as the fireballs can't hit it and an Earth doesn't deal reliable damage (or enough). Hence, stalling out the initial pressure drastically weakens the impact of the Fire at the start of the game.
Archers also outrange Fires and can take sniping shots quickly followed by a garrison to deal 'free' damage on the Earth or Fire without taking any. This does however require very good timing and low ping to pull off without killing your Archer.
Once several swords are built up the Order player can usually force the Fire into garrisoning via simply attacking it with all the swords - returning weak ones to the base is critical to reach enough in the first place and to keep them alive in case the Fire escapes alive.
As the Fire costs 450 gold and the Ele player will have minimal econony at the start, having to deal with a second Fire is near impossible, but Order can gradually bring out another 1 or 2 Archers, at which point the Fire ceases to become such a huge threat.
Tl;dr Stall to counter.
CHair strategy
Information
This is strictly an EvO mid-game strategy, do not attempt this in EvE or EvC.
This strategy can be morphed from the air start or the three earth start, air for short maps and three earths for longer maps. With the air start you can be aggressive and pick off an archer or a miner, or with the three Earths start you will be more on the defensive. You must make sure you are making a stable economy.
Once you have 2-3 airs get a Charrog ASAP, and then attack. Your opponent should have swords + archers, ignore all melee units and attack the archers, you should be able to get a few because of the lock-on function from the airs. Pursue his retreating army, and then pull back if your Charrog gets too wounded. Rinse and repeat.
Countering
Since the Ele player will be having a castle air, running in a lot of cheap units eg. Swordwraths and Archidons, is key to harass, as the castle air is single-target. Just keep running in and picking off a miner, you might lose a sword but it won't matter. Losing an archer will matter though, be careful about that.
Another way to counter is in the mid-game. Turtle with Speartons and Merics to heal. Do not try to get Albows to counter the airs, they can get a Cycloid and destroy your albows. Instead, use a Magikill and poison everybody. Ele has a lot of units with low health, making them vulnerable to any kind of DoT.
Thanks to pumu/IamxSoS for the abbreviation, it stands for Charrog + air.
Other Strategies
These are mostly composed of combinations of different strats. Some are less common strategies that people use, such as Medusa spamming. Some of these less common strats have low viability and often are used instead for trolling noob players or for fun in non-competitive matches.
Magikill Mass
Rarely used in competitive matches due to the slow training time and expensiveness of Magikill, their laughable lack of speed and health, and how easy it is to counter this strategy. The focus of this strategy is to consistently barrage the enemy with a huge amount of spells.
Countering
This strat can be countered with almost anything, but Shadowrath Mass, Medusa Mass, or Archer Mass are usually the fastest ways to eliminate the Magikill swarm.
Medusa Mass
A method of training large amounts of Medusas in order to mass-Petrify the enemy base, destroying it as quickly as possible. This is pretty much always used with a meatshield such as a line of Juggerknights or a Giant or two.
Countering
Shadowrath massing is extremely effective against Medusa massing, as the Shadowrath with Shinobi II will rapidly slaughter all of the Medusas.
V Spam
This strategy uses the destructive power of the V in large numbers, mainly to spawn an overwhelming amount of clones and massacre everything in their path. These Vs are commonly accompanied with a few Airs, Waters, and Charrogs. In order to make this strategy effective, the player must be prepared to teleport at any moment, otherwise the Vs could easily be wiped out by Shadowrath on Shinobi II or a hail of arrows fired by Archidon masses.
Countering
Shadowrath + Archer seems to be the most plausible counter to V spamming. Shadowrath on Shinobi II is one-shot-kill to Vs, and combining them with Archers can make for annoying kiting techniques and hit-and-run tactics.
Giant + Dead
This strategy involves massing Giants and Deads in order to wreak serious havoc. The only downside is that Deads and Giants are extremely slow.
Countering
Shadowrath masses can kill all of the Deads via Shinobi due to Deads being slow and unable to escape. Archer masses can also kite the Giants to death.
AirMass
This strategy involves training large amounts of Airs to slaughter enemies with a devastating wave of unblockable, inescapable lightning bolts. They can also be used to pick at spellcasters due to their lock-on ability; if all of the airs target the spellcaster at once, there is little the enemy can do to save the doomed caster. Adding Charrogs to this strat is common, and can easily transpose to the CHair strategy.
Cycloid Spam
Involves training large amounts of Cycloids to spam the Whirlwind ability. Also used to protect large amounts of units, mainly the Cycloids themselves or a Charrog. This can be a rather annoying strategy due to the fact air units are often very vulnerable to Cycloids and the spamming of Whirlwind can be cancerous at times, killing an Archidon mass with two tornadoes.
Countering
Shadowrath Rush can go straight through the Cycloid mass to attack the enemy base. Archer mass can take potshots at Cycloids as Cycloids entirely rely on Whirlwind to attack ground units; they cannot hit ground units with their basic attacks but beware for the Elementals may use a scorch to quickly eliminate the Shadowrath army and the Cycloid can focus their Whirlwind towards the Archers.
Marrowkai Mass
A rather unusual strategy, involving the massing of Marrowkai to spam Hell Fists on the enemy. Usually used to play around in unrated games or to troll noobs due to the relative unreliablility of this strategy. It is also very difficult to coordinate multiple Hell Fists at the same time (so far, the only things that can effectively spam Hell Fists is the Insane Chaos AI).
Countering
Shadowrath Rush can easily slaughter the mass of Marrowkai, as they have no defense against Shinobi II.
Ninja + Archer
A strategy used by many top-tier players (2000+ rating) especially in OvE battles, due to their flexibility, versatility, and speed. Ninjas are pretty much the only viable counter against Vs (which are arguably the most destructive and powerful units in the game), and Archers can outrange the Elementals and kite them to death.
Countering
Ninja + Archer combines two of the most infamously cancerous units in the game, and there are ultimately no hard counters except for preventing this from happening via economy harassment.
Ninja + Giant
Another strategy that combines two of the most cancerous and powerful units in the game. The point behind the strategy is to use Giants to tank and do high damage to enemies and Ninjas to assassinate certain units such as Magikill. These ninjas can also double as scouts, hit-and-run attackers, or even frontline troops.
Countering
Theoretically, Giant + Albow can potentially counter this strat but it is a soft counter; no hard counters for this strat exist.
General Misc Strategies
"Deathball"
Strategies that involve a deadly combination of units are called "deathball" strategies, although there is no official name for them. Strategies like that are called "deathball" strategies because it uses the combined might of many of the units in the selected empire. If the enemy isn't prepared, deathball strats can prove extremely dangerous to the opponent.
"Deathball" (Order)
This strategy usually consists of 5 to 7 fully-grown Order Giants, a Magikill or two, a small group of Merics, some Archidon (optional), 2 Albowtross with Blazing Bolts, and some Speartons (optional). Shadowrath with Shinobi II can also be used to assassinate enemy units, although this is optional. Another deathball strat is to use the same layout but there will be two Giants instead of 5 or 7, and they will be replaced by a mass of Swordwrath with Rage.
"Deathball" (Chaos)
Chaos can also use the deathball strategy. A Chaos deathball is similar to its Order counterpart. It consists of 5 to 7 fully-grown Chaos Giants, 1 Marrowkai, 1 Medusa, 2 or more Eclipsors, some Deads, and potentially some Bombers (optional).
"Deathball" (Elemental)
Elemental deathballs consist of 7 to 10 Charrogs, a V or two, some Water and Air elementals, some Cycloids, an Infernos, and a Treature. Fire elementals can also be used, both for general mayhem and Scorch.
Countering
Most deathballs can be countered by a Shadowrath Rush (do not try a Shadowrath Rush against an Order deathball that has a raging swordwrath mass). The best way to counter this strategy, however, is to either make a deathball yourself faster than the enemy player does or harass his economy with hit-and-run attacks on his miners before he even starts his strat in the first place.